“Bottle capping”, as my family calls it, started when I came across a sign at an art gallery in the NC mountains a few years ago. It was just an old, worn piece of wood with bottle caps nailed on it to spell out the word “WELCOME”. All that is needed to inspire my usual and often load hobby. My tools include a hammer, small nails, pliers, random pieces of scrap wood and a whole lot of bottle caps. There is no method involved, I just bend and hammer them in wherever I need them to go.

My first bottle cap project was this colorful fish.
I cut out a general shape out of scrap wood for what I want to make. Then I lay bottle caps on it, playing around with colors and positioning to get a sense of how I want it ot look. When I’m satisfied, I take a photo of it so I can remember what went where. Then I start bending and hammering bottle caps on one at a time.

Planning the owl.

The finished owl is my favorite creation so far!
My daughter decided to give it a try. I helped her cut out the flower shape from a piece of scrap wood and she did the rest on her own. She decided to paint the wood before nailing on the bottle caps.

Maggie’s flower!
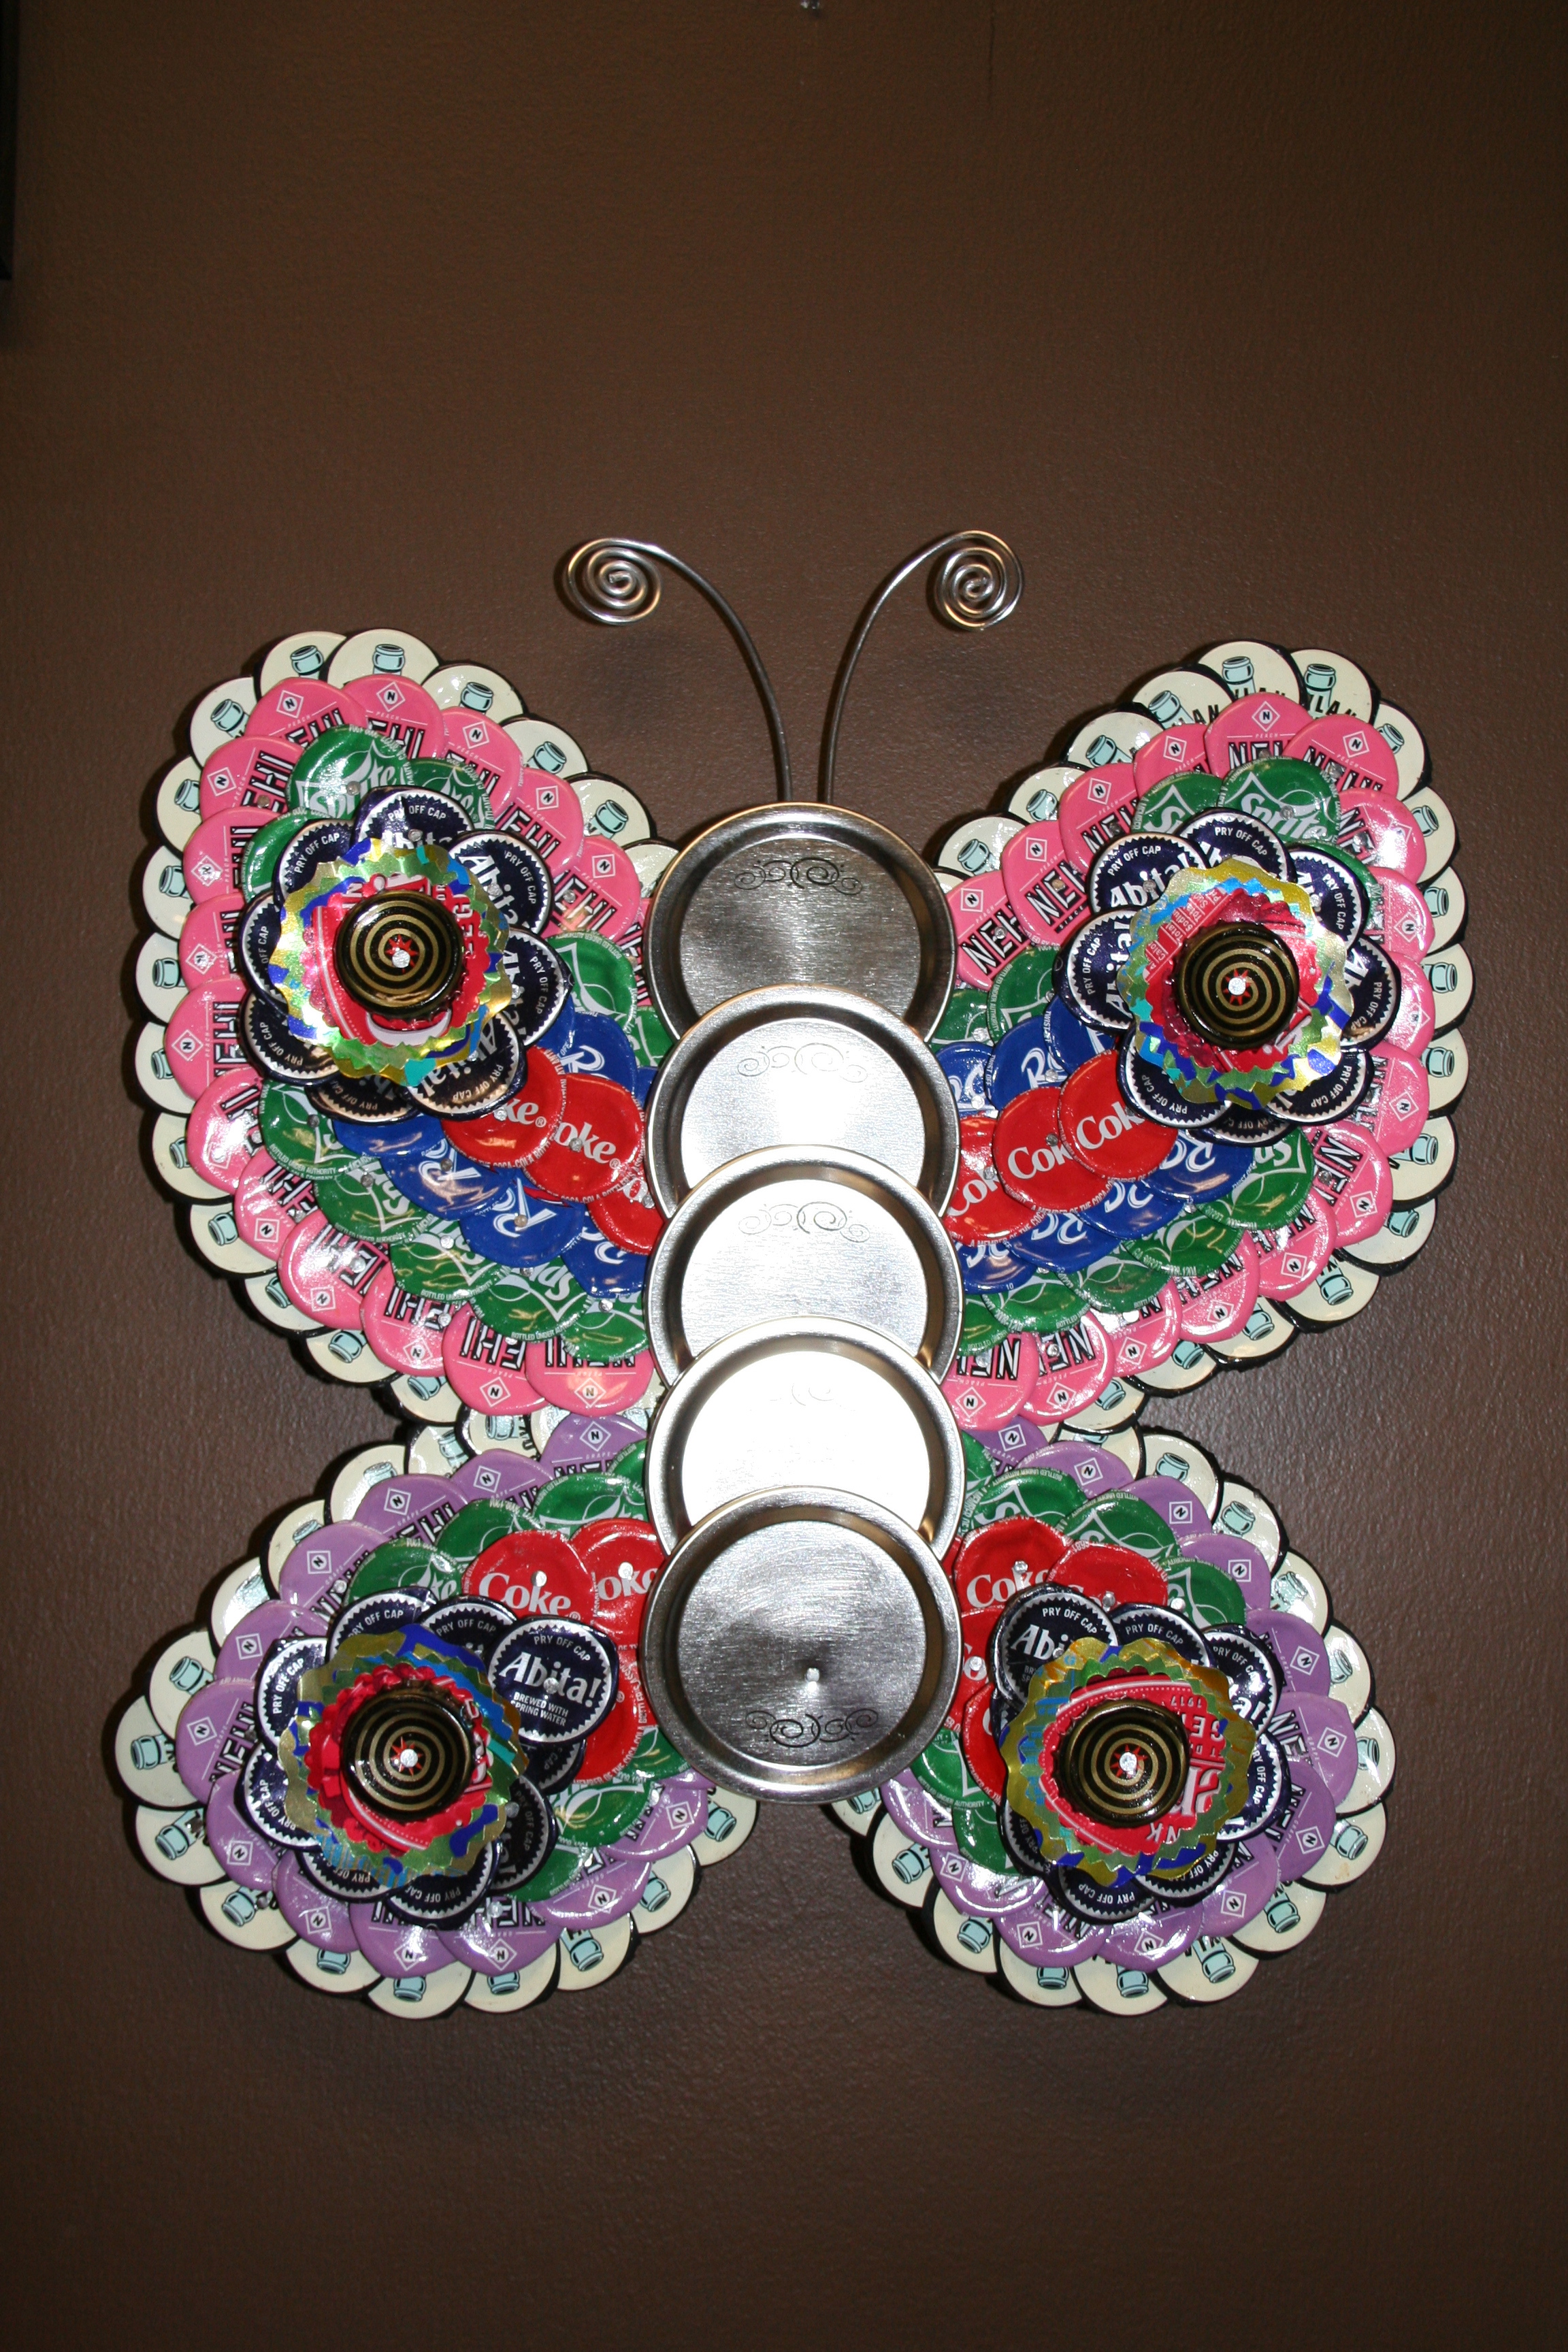
I made a bottle cap butterfly for Senora Almodovar.
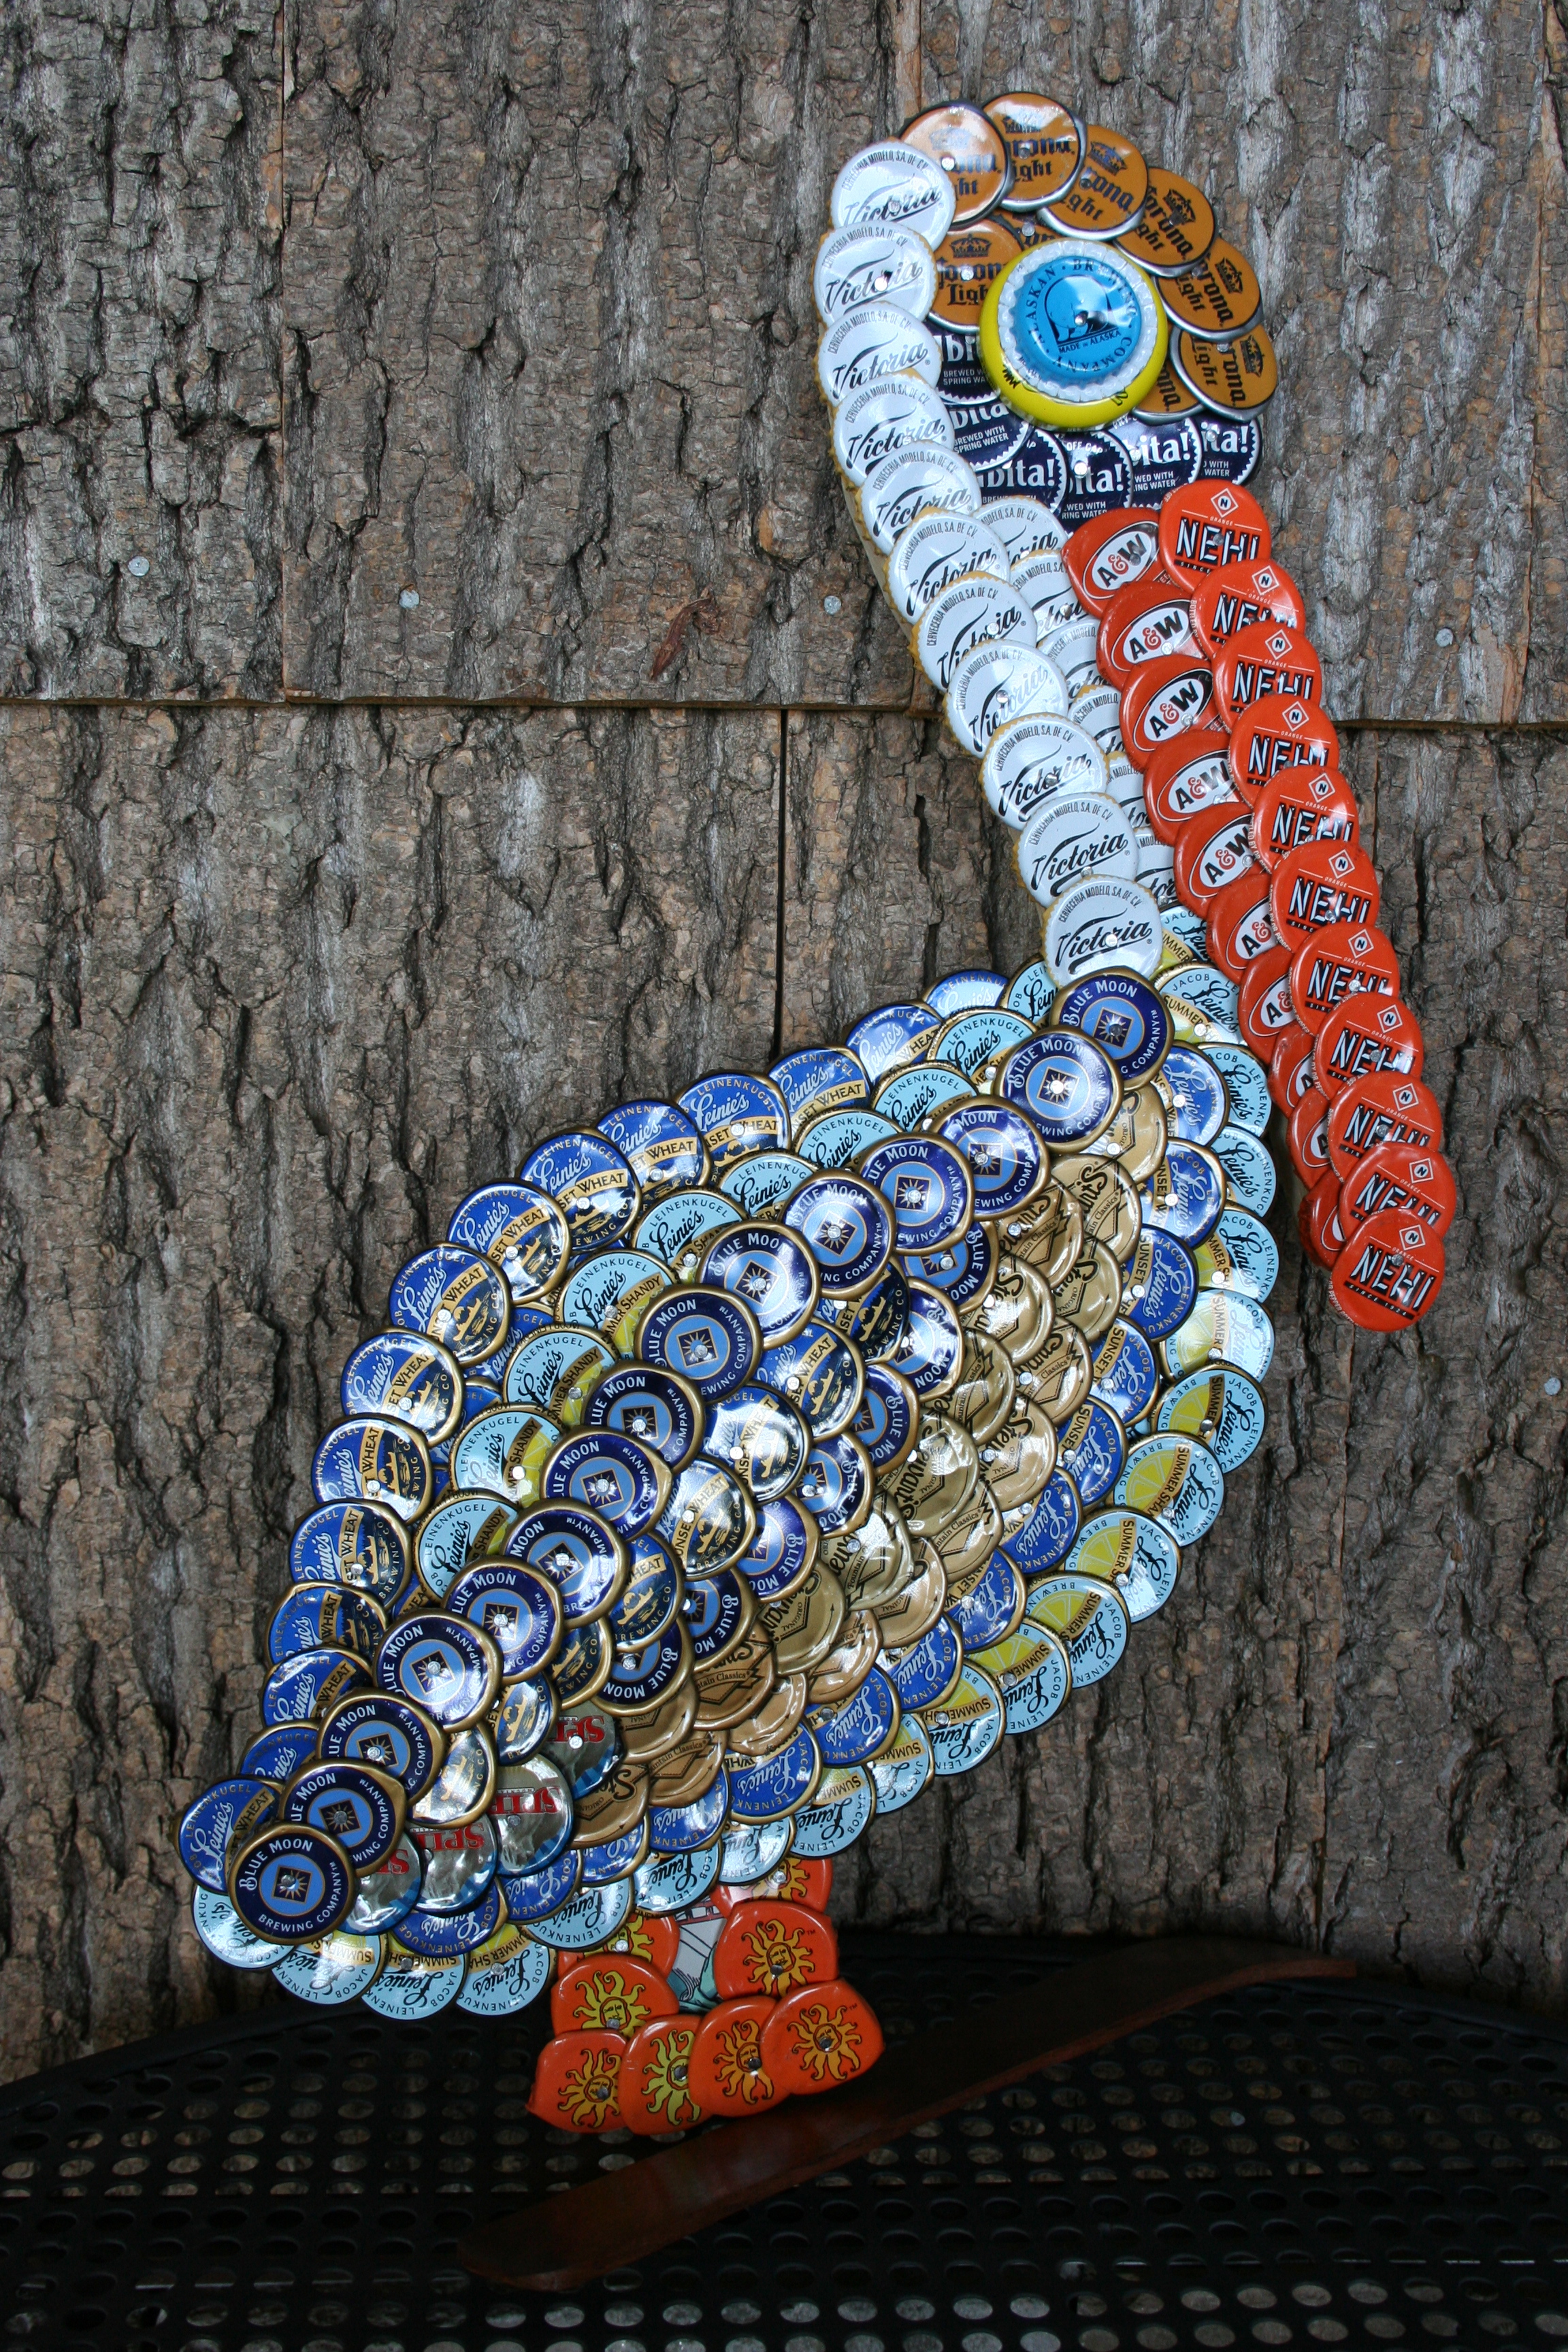
My mother had always loved pelicans, so I made her this one to hang on her porch in Florida.
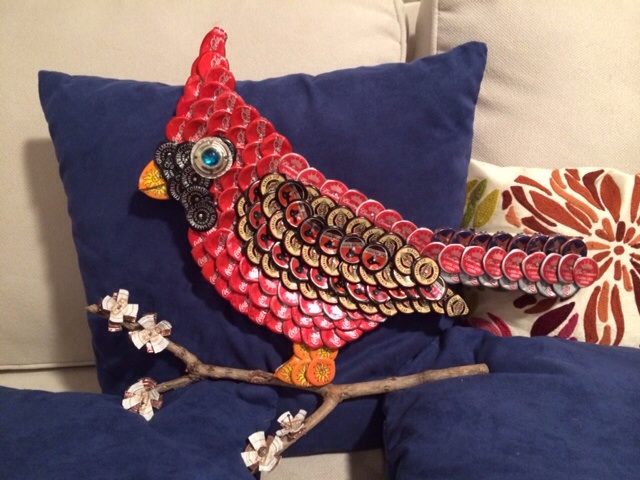
Another project I made for a friend was this cardinal.
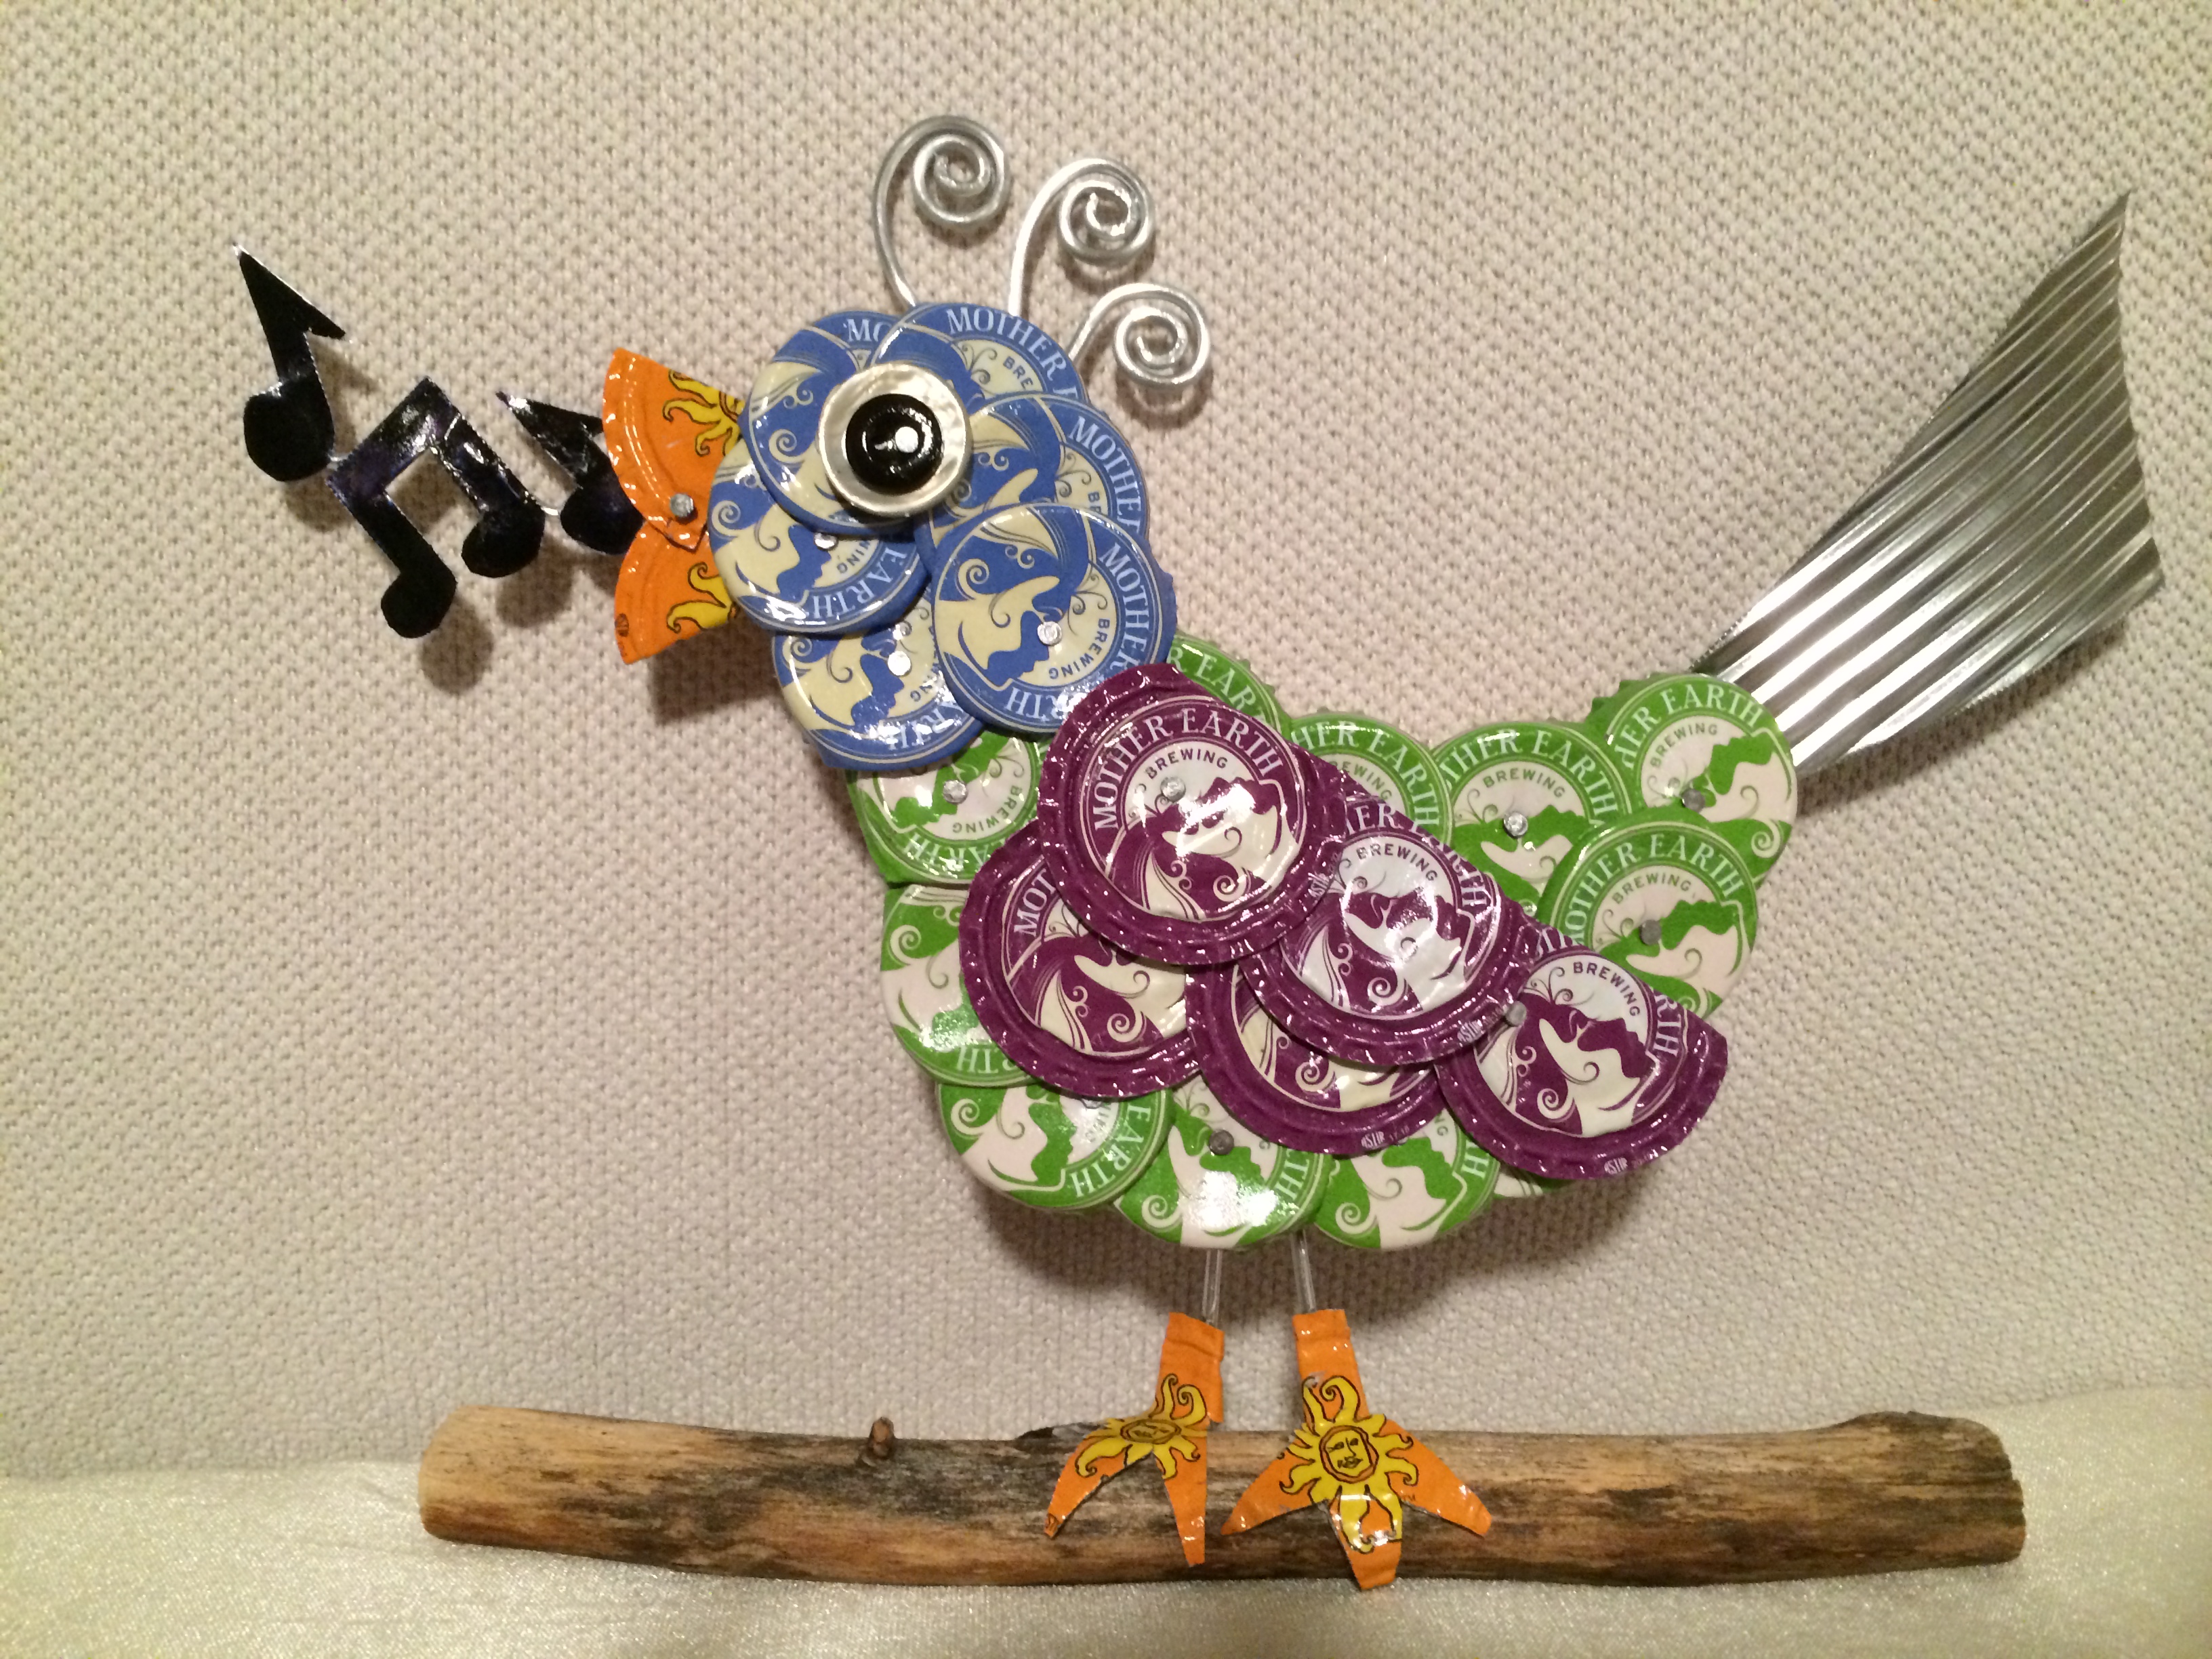
And I made this “song” bird for Mrs. Pause when she retired from teaching music at DA.