This is an easy craft with a different result every time.
You need:
a blank canvas (I used 11×14) – I think a solid board canvas is better than the wood frame with canvas stretched around it so the dried crayon wax doesn’t crack and break off.
a box of crayons
tacky glue
a hairdryer
something to cover your work area
an easel or box
something to protect your hand from the blow dryer heat and help direct the airflow (I used a silicone pot holder)
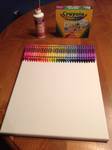
1) Glue the crayons across the top of the canvas. You can choose any color pattern you want. I arranged mine in a rainbow pattern. Be sure to let the glue dry or the crayons could fall off.
2) While the glue dries, cover your work area with newspaper, a trash bag or a disposable table cloth. You would be amazed at the number of tiny wax spots that can end up 2-3 feet away!
3) Set up an easel or an old box to hold the canvas upright at a slight tilt. Without having the canvas upright, the crayons will just melt into a puddle and will not drip down the canvas.
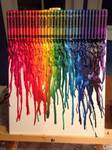
4) Once the glue has dried, use a blow dryer to melt the crayons. It takes some time for the crayons to start melting, so be patient. Work on one area at a time, giving the melting process a chance to really get going. Be careful to direct the blowing air onto the paper part of the crayons. If you hit the melting parts of the crayon, it will splatter! Also, if you point it down on the dripping parts, they can be pushed out to the sides and mix with neighboring colors.
You can melt as much or as little as you choose. You can also point the hairdryer straight down on the drips below to re-melt them and create different patterns. Just have fun with it!
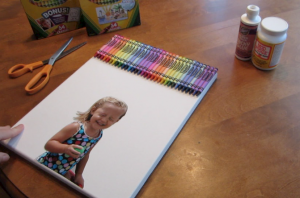
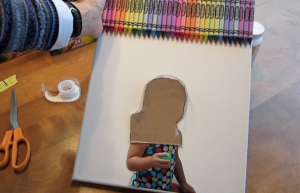
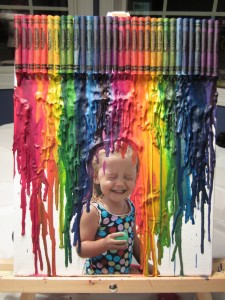
For a fun twist, you can try dripping the crayons over a silhouette cut-out or picture. I choose a picture of my daughter looking like something was being poured over her head. I used an 8×10 print so that her imaged would not be too small on the 11×14 canvas.
1) Cut out the picture you would like to use and glue it on your canvas. Save the scrap border to use later.
2) Glue your crayons along the top edge in the pattern of your choice. I chose to do a repeating rainbow design.
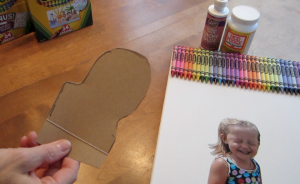
3) When the glue is dry, you will cover your picture with cardboard. I used an empty Wheat Thins box and the scrap from the photo I cut out to trace the image I was using. Cut out the matching cardboard shape and taped it over your picture to keep it from getting completely covered with crayon wax. I wanted to be able to see most of the original picture with wax around the outside when I was done.
4) Next, put the canvas on your easel or against a box on your covered work area and begin melting the crayons with the blow dryer.
5) Once you have most of the crayons melted the way you want them, remove the cardboard from the image. Scrap any unwanted crayon residue off the picture – you may have to warm it briefly with the blow dryer for a couple seconds and then wipe away with a tissue/paper towel. It comes off a glossy photo easily, but watch out…it is melted wax so it can be hot!
6) Now point the blow dryer on the ridge of crayon wax that built up along the top of your image to soften and melt it a bit. I let mine drip a little so it looked like it was running over my daughter’s head and face. If you do too much, you can wipe it off the picture with a tissue/paper towel while still warm. Be careful not to melt it too much or too quickly because it can thin out and let the canvas show through. You have to pay attention!
7) Step back and enjoy your finished product!
If you would like to see a high speed video of this project being done, click below!


One Response